

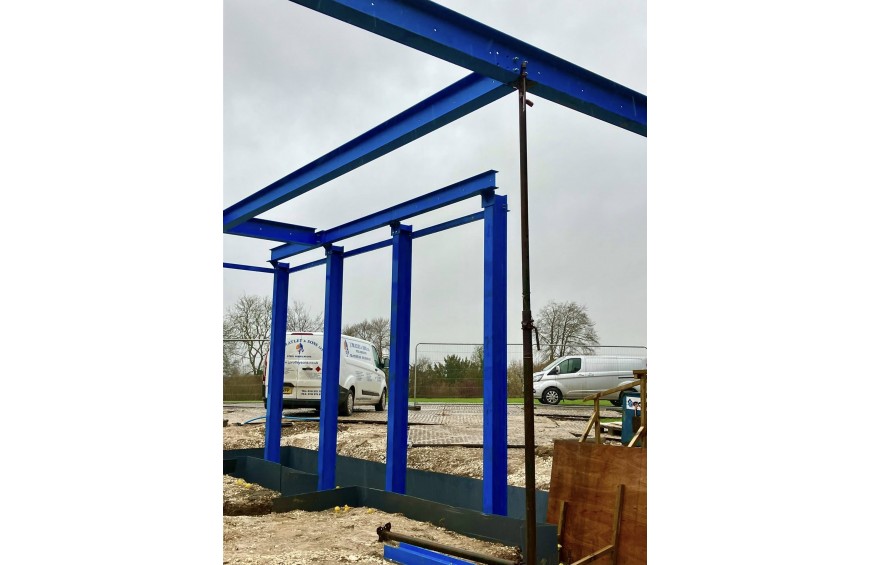
The structural calculations are perfect. The beam specification is correct. Building Control has approved the design. The steel arrives on site, gets positioned, and the wall closes up around it. Six months later, cracks appear radiating from the beam ends. Twelve months later, the ceiling shows visible sagging. Eighteen months later, a Building Control officer notices the problems during an unrelated inspection and issues an enforcement notice requiring expensive remediation.
The beam hasn't failed—the installation has. The £1,200 beam is fine. But the £8,500 structural repairs now required stem from installation mistakes that seemed minor at the time: padstones that were "close enough" to specification, bearing that was "good enough" despite being 20mm short, connections that were "basically secure" despite missing half the specified bolts. These shortcuts and misunderstandings don't cause immediate dramatic failures. They create slow-developing structural problems that become expensive emergencies months or years after the builder has moved on to other projects.
For builders, self-builders, and developers across the UK installing structural steel beams, understanding common installation failures and their consequences transforms abstract structural requirements into concrete understanding of why specifications exist and what happens when they're compromised. Because Building Regulations and structural engineering specifications aren't bureaucratic box-ticking—they're the accumulated wisdom from decades of installation failures teaching us what doesn't work.
This analysis explains the common installation mistakes that cause beam failures, demonstrates through real examples what happens when installations deviate from specifications, quantifies the cost and timeline impact of remediation, and provides practical guidance ensuring beam installations that perform correctly for building lifetime rather than failing prematurely from preventable errors.
Failure Category 1: Bearing and Support Issues
The beam ends must rest on adequate bearing surfaces transferring loads safely to supporting structure. This is where most installation failures originate.
Mistake 1: Insufficient Bearing Length
What the specification says: "Minimum 100mm bearing on engineering brick padstone" or "150mm bearing on concrete block inner leaf"
What actually gets installed: Beam sits on 75mm bearing because the wall wasn't quite thick enough and builder didn't want to rebuild to correct specification.
Why this matters structurally:
Bearing stress calculation:
- Beam reaction: 40kN (4 tonnes) at each end
- Specified bearing: 100mm × 102mm (beam width) = 10,200mm² area
- Specified bearing stress: 40,000N ÷ 10,200mm² = 3.9 N/mm²
- Engineering brick capacity: ~4-5 N/mm²
- Result: Adequate bearing stress ✓
Actual installation:
- Actual bearing: 75mm × 102mm = 7,650mm² area
- Actual bearing stress: 40,000N ÷ 7,650mm² = 5.2 N/mm²
- Result: Exceeds brick capacity, progressive crushing occurs
What happens over time:
Month 1-6: Bearing appears fine, no visible problems Month 6-12: Microscopic crushing begins at bearing interface Month 12-18: Visible cracks appear in brickwork below beam Month 18-24: Beam settles measurably (2-5mm), ceiling cracks appear Year 2-3: Progressive deterioration continues, structural movement increases Eventually: Emergency intervention required, beam must be temporarily supported while bearing is corrected
Real example: Extension on 1930s semi-detached, 178×102 UB19 beam on 80mm bearing (specification: 100mm). Initial installation appeared satisfactory. After 14 months, homeowner noticed cracks in kitchen wall radiating from beam end downward at 45-degree angle. Structural survey revealed bearing crushing.
Remediation required:
- Temporary propping of beam: £800
- Partial wall demolition accessing bearing: £600
- New engineering brick padstone installation: £450
- Beam repositioning on correct bearing: £400
- Wall rebuild and plasterwork: £1,200
- Building Control retrospective approval: £280
- Total: £3,730
Prevention cost: Rebuilding wall to correct thickness before beam installation: £350
The 90% rule doesn't apply: "Close enough" doesn't work with bearing. 80% of specified bearing creates 125% bearing stress—over capacity. Either provide specified bearing or redesign with larger padstone distributing loads across greater area.
Mistake 2: Uneven or Rocking Bearing
The problem: Beam doesn't rest uniformly across full bearing length. Load concentrates on portions of bearing while other areas carry nothing.
Common causes:
- Bearing surface not level (slopes or has high/low spots)
- Beam not installed level (twisted or canted)
- No mortar bed under beam (point contact instead of uniform bearing)
- Debris or protrusions preventing full contact
Structural effect:
Design assumption: 100mm bearing × 102mm width = 10,200mm² effective area Actual contact area: Perhaps 60% of nominal area due to uneven surface Effective bearing: 100mm × 60mm = 6,000mm² (remaining 40% not in contact) Bearing stress: 40,000N ÷ 6,000mm² = 6.7 N/mm² Result: Localized overstress, crushing at contact points
Visual symptoms:
- Mortar crushing visible at contact points
- Gaps visible between beam and substrate elsewhere
- Beam slightly twisted or not sitting square
- Uneven cracking patterns in supporting masonry
What happens: Localized crushing progresses, beam settles unevenly creating torsional stress. Can lead to beam rotation (twist along length) as one end settles more than other.
Real example: Victorian terrace loft conversion, beam installed on brick padstone without mortar bed. Padstone surface had 3mm variation in height across 100mm bearing length. Beam rocked slightly on installation but builder deemed it "secure enough." After 8 months, visible gap appeared one side of bearing, beam had rotated approximately 2 degrees creating lateral thrust on supporting wall.
Remediation:
- Emergency temporary support: £650
- Beam removal: £300
- Padstone surface leveling: £200
- Proper mortar bed installation: £120
- Beam reinstallation: £400
- Structural survey confirming adequacy: £450
- Total: £2,120
Prevention: 10mm mortar bed and level checking during installation: £50 materials + 30 minutes labor
The lesson: Uniform bearing requires level surfaces and full mortar bed. "Close enough" bearing creates point loads exceeding capacity.
Mistake 3: Bearing on Wrong Substrate
The problem: Beam bears on material inadequate for structural loads without padstones or spreading.
Common wrong substrates:
Aerated concrete blocks (Thermalite, Celcon):
- Compressive strength: ~3.6-7.0 N/mm²
- Bearing capacity: ~0.5-0.8 N/mm² (very low due to cellular structure)
- Typical beam bearing stress: 3-5 N/mm²
- Result: Bearing stress 4-8× substrate capacity
Lightweight aggregate blocks:
- Better than aerated but still weak compared to engineering brick
- Bearing capacity: ~1.5-2.0 N/mm²
- Marginal for typical beam loads without spreading
Standard facing bricks (unknown strength):
- Variable quality (strength 10-30 N/mm² typical)
- Bearing capacity: ~1.5-2.5 N/mm² depending on quality
- May be adequate but uncertain without specification
Old or damaged masonry:
- Original strength unknown
- Deterioration from age, weather, previous movement
- Bearing capacity compromised but not obvious
What happens: Substrate crushes under beam load. Crushing may be immediate (hours/days) for very weak materials, or progressive over months/years for marginally inadequate substrates.
Real example: Self-build extension, beam specified to bear on "dense concrete block inner leaf." Builder used standard 3.6N blocks (thought "concrete block" covered any type). Beam installed, appeared satisfactory. Within 3 weeks, noticeable settlement—beam dropped 8mm, wall above cracked.
Investigation: Blocks were crushing under bearing load (compressive failure visible in top course)
Remediation:
- Emergency structural assessment: £600
- Temporary beam support: £750
- Block removal and engineering brick padstone installation: £850
- Beam repositioning: £400
- Wall repairs: £900
- Total: £3,500
Prevention: Verify actual block specification before beam delivery, use engineering bricks or concrete padstones: £200
Critical point: "Concrete block" isn't specific enough. Dense concrete block (7N minimum), lightweight aggregate block (7N), or aerated block (3.6N) have vastly different capacities. Specification must be specific, builder must verify actual material matches specification.
Mistake 4: Inadequate or Missing Padstones
When padstones required:
- Bearing on standard bricks/blocks (not engineering brick)
- High beam reactions (>30kN typical threshold)
- Cavity walls (load must spread to both leaves)
- Questionable substrate quality
What they do: Spread beam point loads across larger area, reducing bearing stress on substrate to acceptable levels.
Common padstone mistakes:
Too small:
- Specified: 440mm × 215mm × 150mm concrete padstone
- Installed: 215mm × 215mm × 100mm (builder thought "rough size" acceptable)
- Result: Inadequate load spreading, bearing stress still excessive
Wrong material:
- Specified: C20 concrete padstone
- Installed: Engineering brick padstone (adequate if properly designed but different capacity)
- Result: May work but installation doesn't match approved design
Not through wall thickness:
- Cavity wall, padstone only on inner leaf
- Outer leaf doesn't receive load transfer
- Result: Inner leaf overloaded, outer leaf underutilized
No reinforcement:
- Concrete padstone specified with A193 mesh reinforcement
- Installed without reinforcement
- Result: Padstone may crack under load, reducing effectiveness
Real example: 1960s semi-detached, cavity wall construction. Beam specified to bear on 440×215×150mm concrete padstone extending through cavity to both leaves. Builder installed 215×215×100mm padstone on inner leaf only (quicker, saved concrete).
Timeline:
- Initial installation: Appeared adequate
- 6 months: Hairline cracks in inner leaf blockwork
- 12 months: Visible crushing of blocks below padstone
- 18 months: Beam settlement 5mm, wall cracking significant
Remediation:
- Structural engineer assessment: £750
- Emergency temporary support: £900
- Partial wall opening for access: £650
- Proper padstone fabrication and installation: £850
- Beam repositioning: £500
- Wall rebuild: £1,400
- Building Control retrospective approval: £350
- Total: £5,400
Prevention: Install padstone as specified: £280 (materials £180, labor £100)
Ratio: £280 correct installation vs £5,400 remediation = 19× cost multiplier for shortcut
Failure Category 2: Connection and Fixing Issues
Beams often connect to other structural elements—columns, walls, existing beams. Connection adequacy determines structural integrity.
Mistake 5: Missing or Inadequate Bolted Connections
Scenario: Beam bolts to steel column or connects to existing steel beam
Specification: "4 No. M16 Grade 8.8 bolts through web, torqued to 200Nm"
Common installation shortcuts:
Fewer bolts: "3 bolts is close to 4, should be fine" Wrong grade: M16 Grade 4.6 bolts (hardware store availability) instead of specified 8.8 Not torqued: Bolts hand-tightened or impact-driver tightened (inconsistent, often under-torqued) Hole alignment issues: Oversized holes (>2mm oversize) drilled to force alignment, reducing connection capacity
Why this matters:
Connection design: Structural engineer calculates connection for specific shear, moment, and tensile forces. Connection capacity depends on:
- Number of bolts (more bolts = higher capacity)
- Bolt grade (higher grade = stronger material, higher capacity per bolt)
- Torque (proper pre-load creates clamping force, changes failure mode from bolt shear to friction)
- Hole tolerance (oversized holes reduce bolt bearing area)
Example calculation:
- Design load: 60kN shear across connection
- 4× M16 Grade 8.8 bolts: 18kN capacity each = 72kN total (safety factor included)
- 4 bolts adequate with margin
If only 3 bolts installed:
- 3× M16 Grade 8.8 bolts: 54kN total
- Below design load, connection overstressed, safety margin eliminated
If 4× Grade 4.6 bolts used instead:
- 4× M16 Grade 4.6: ~11kN each = 44kN total
- Severely under capacity, connection likely to fail under design loads
What happens: Connection doesn't fail immediately under normal loads (unless severely inadequate). Failure occurs during:
- Higher than typical loading (snow, wind, occupancy)
- Dynamic loads (impact, vibration)
- Fatigue accumulation over time
When connection fails:
- Bolts shear (snap) under load
- Beam drops, losing support
- Sudden structural collapse possible
Real example: Commercial mezzanine, steel beams bolted to columns. Specification: 6× M20 Grade 8.8 bolts per connection. Installer used 4× M16 Grade 4.6 (what was in van stock, "close enough for this job").
Timeline:
- Initial installation: Appeared secure
- 9 months operation: No obvious problems
- Winter with heavy snow loading: Increased roof loads transferred to mezzanine structure
- Connection bolts began yielding (permanent deformation) under load
- Beam dropped 3mm at connection before catching on adjacent structure
- Discovered during routine inspection
Emergency remediation:
- Immediate load restrictions on mezzanine: Loss of usable space
- Temporary support installation: £1,200
- All connections inspection revealing multiple under-specification: £800
- Correct bolt procurement and installation (all connections): £2,400
- Structural engineer re-certification: £900
- Lost business from reduced mezzanine capacity (2 weeks): £8,000
- Total: £13,300
Prevention: Correct bolts as specified: £180 (materials £120, labor £60)
Ratio: £180 vs £13,300 = 74× cost multiplier for shortcut
Mistake 6: Welded Connections Without Certification
The problem: Connections requiring certified welding performed by unqualified welder or without required inspection.
Structural welding requirements:
- Welder qualification/certification (many welding certificates don't cover structural)
- Correct welding procedure (weld type, size, position, electrode, technique)
- Inspection and testing (visual, NDT, or destructive as specified)
- Documentation (weld maps, inspection certificates)
Common shortcuts:
- "I can weld" ≠ "I'm qualified for structural welding"
- Visual appearance ("looks good") ≠ structural adequacy
- Missing inspection/testing
- Wrong electrode/process (using what's available, not what's specified)
What happens: Inadequate welds create hidden defects:
- Incomplete penetration (weld doesn't fully fuse base materials)
- Porosity (gas pockets weakening weld)
- Slag inclusions (foreign material in weld)
- Undercut (groove in base material reducing effective thickness)
- Cracking (stress risers leading to failure)
These defects aren't always visible but catastrophically reduce connection strength.
Real example: Barn conversion, steel beam welded connection to existing steel frame. Specification: "Site weld by coded welder, NDT inspection required." Builder's "mate who welds" performed connection, visual inspection only.
Timeline:
- Installation: Appeared satisfactory
- 18 months: Connection weld developed crack from incomplete penetration
- 22 months: Crack propagated, weld failed partially
- Beam rotated 5 degrees at connection, supported by adjacent members preventing collapse
Discovery: Building Control inspection for different work noticed beam misalignment
Enforcement:
- Stop notice on building use
- Structural engineer investigation: £1,800
- Temporary support: £1,400
- Weld testing (destructive sampling): £650
- All structural welds inspection revealing multiple inadequate connections: £900
- Re-welding by certified welder with inspection: £3,200
- Building Control sign-off: £450
- Total: £8,400
- Business closure period: 3 weeks (barn conversion was holiday let, lost bookings ~£4,500)
Prevention: Certified structural welder from outset: £800
Ratio: £800 vs £12,900 total = 16× cost multiplier for shortcut
Failure Category 3: Installation Process Errors
Beyond specification compliance, installation technique affects long-term performance.
Mistake 7: Rushed Installation Without Adequate Preparation
The scenario: Beam delivery delayed, building program compressed, pressure to "get it in" quickly before inspections or weather changes.
Common rush-induced errors:
Inadequate bearing preparation:
- Surface not properly cleaned (debris, loose mortar)
- Bearing not level (no time for shimming/packing)
- Mortar bed omitted or poorly applied
Measurement errors:
- Beam positioned incorrectly (±20mm tolerance instead of ±5mm specification)
- Level not checked properly
- Alignment with adjacent structure ignored
Missing documentation:
- No photographs of bearing/connections
- Measurements not recorded
- Building Control not notified for inspection before closing up
Incomplete work:
- Fire protection deferred ("we'll come back to that")
- Temporary supports removed prematurely
- Connections partially installed ("finish tomorrow")
Why rush creates failures:
Structural: Improper preparation creates point loads, uneven bearing, inadequate connections—all problems discussed above
Compliance: Work progresses before inspections, gets closed up, problems discovered later requiring expensive opening up and remediation
Documentation: No proof of correct installation when questions arise (insurance claims, sales, future alterations)
Real example: Kitchen extension, beam delivery delayed 3 days by supplier. Builder under pressure (plastering booked, customer demanding progress). Beam arrived Friday afternoon, builder rushed installation to close up before weekend.
Errors made:
- Bearing surface not properly leveled (5mm variation, builder thought "good enough")
- Mortar bed not used (dry bearing)
- Building Control not called for bearing inspection before building up around beam
- Beam positioned 15mm off design location (affects load path slightly)
- Fire protection deferred
Timeline:
- Weekend: Builder closed up around beam, continued work
- Following Tuesday: Building Control officer routine inspection, noticed beam installed without bearing inspection
- Investigation revealed multiple installation errors
- Enforcement notice requiring opening up for inspection
Remediation:
- Wall demolition for access: £850
- Inspection revealing inadequate bearing: £400
- Bearing correction (leveling, mortar bed, positioning adjustment): £650
- Fire protection installation: £380
- Wall rebuild: £1,200
- Delay to project (2 weeks): Additional costs £2,400 (idle follow-on trades, extended scaffolding, customer relationship damage)
- Total: £5,880
Prevention: Proper installation with 1 additional day allowing adequate preparation: £150 (one day additional labor)
Ratio: £150 vs £5,880 = 39× cost multiplier for rush
Mistake 8: Inadequate Protection During Installation
The problem: Beam arrives protected (paint, galvanizing, fire protection coating). During installation, protection damaged through handling, dropped tools, welding splatter, mortar contamination.
Common damage:
- Galvanizing scratched/gouged from chains, straps, dropped tools
- Paint chipped from rough handling
- Protective coatings damaged allowing corrosion to initiate
- Mortar splatter on surfaces creating localized corrosion
Why this matters:
Short term: Cosmetic damage if beam will be visible Long term: Corrosion initiates at damage points, progressing inward over years
Steel corrosion progression:
- Year 0: Surface protection damaged, steel exposed
- Years 1-3: Surface rust forms (cosmetic initially)
- Years 3-10: Rust progresses, creating scale and pitting
- Years 10-20: Section loss begins (beam getting thinner from rust)
- Years 20-30: Structural capacity potentially affected if section loss significant
- Eventually: Possible structural concern requiring remediation
Real example: Office refurbishment, exposed architectural steelwork (visible in finished space). Galvanized beams specified. During installation, rough handling and welding created multiple damage points in galvanizing. Builder didn't repair damage ("it's just scratches, doesn't affect structure").
Timeline:
- Year 0: Installation complete, cosmetic damage noted but not addressed
- Years 1-2: Rust staining beginning at damage points
- Year 3: Client complaint about appearance (office space with visible steelwork)
- Year 4: Rust progressing, section loss beginning at some points
- Year 5: Coating company assessment: damage too extensive for simple touch-up repair
Remediation options:
- Accept deterioration (unacceptable in architectural application)
- Overcoat entire beam with paint system (changes appearance)
- Remove and replace damaged beams (very expensive)
Client chose option 2: Full coating system
- Access scaffolding: £2,200
- Surface preparation (grind rust, clean): £1,800
- Multi-coat paint system application: £3,400
- Total: £7,400
Prevention: Protective wrapping during installation + galvanizing touch-up immediately after any damage: £280
Ratio: £280 vs £7,400 = 26× cost multiplier for inadequate protection
Failure Category 4: Design-Installation Mismatch
Sometimes the installation doesn't match the design—not through obvious error but subtle deviation.
Mistake 9: Beam Orientation Wrong
The problem: Universal beams are NOT symmetrical. They have strong axis (bending about major axis through deep web) and weak axis (bending about minor axis through narrow flanges).
Design assumption: Beam installed with web vertical (strong axis resisting loads)
Actual installation: Beam rotated 90 degrees, web horizontal (weak axis resisting loads)
Capacity difference:
Example: 203×133 UB25
- Strong axis moment capacity: ~60 kNm
- Weak axis moment capacity: ~15 kNm
- Weak axis is 25% of strong axis capacity
If beam installed rotated 90 degrees:
- Design assumes 60 kNm capacity
- Actual capacity: 15 kNm
- Beam loaded to 400% of actual capacity
How this happens:
- Beam arrives on site
- Nobody checks orientation marks
- "Beam is symmetric, doesn't matter which way it goes"
- Installed wrong way
- Casual visual inspection doesn't reveal error (both orientations "look like a beam")
What happens: Beam severely overstressed from day one. May exhibit:
- Immediate visible deflection (sagging)
- Progressive deflection increasing over time
- Cracking in supported structure above
- Eventual structural failure if loads approach actual capacity
Real example: Loft conversion, 254×146 UB31 specified. Installed with flanges vertical (web horizontal) instead of web vertical (flanges horizontal).
Discovery: Building Control inspector spotted error during final inspection (3 months post-installation). By this point:
- Beam had deflected 15mm (visible sag in ceiling)
- Plasterwork cracked
- Structural adequacy questioned
Remediation:
- Structural engineer assessment: £850
- Temporary support installation: £1,200
- Beam removal: £600
- Correct reinstallation (proper orientation): £700
- Ceiling repair: £800
- Delay and inconvenience to client: Unquantifiable but significant
- Total: £4,150
Prevention: Check beam orientation before installation, verify against structural drawings: £0 (just attention to detail)
Ratio: £0 prevention cost vs £4,150 remediation = infinite cost multiplier
Mistake 10: Wrong Beam Entirely
The problem: Beam specification: 254×146 UB31 in S275 steel Beam delivered and installed: 254×102 UB25 in S275 steel
How this happens:
- Ordering error (wrong beam ordered)
- Delivery error (wrong beam shipped)
- Installation proceeds without verification against structural drawings
- "It's a steel beam the right length, close enough"
Structural implication:
254×146 UB31:
- Section modulus: 320 cm³
- Moment capacity: ~88 kNm
254×102 UB25:
- Section modulus: 256 cm³
- Moment capacity: ~70 kNm
Wrong beam capacity: 80% of specified beam
If design loads approach beam capacity, the wrong beam is inadequate despite being "similar size."
Real example: Commercial mezzanine, 8 beams specified as 305×165 UB40. Supplier delivered 305×127 UB37 (similar but lighter). Installation team didn't verify, installed wrong beams.
Discovery: Structural engineer site visit (different matter) noticed beams didn't match drawings. Investigation revealed all 8 beams wrong specification.
Consequence:
- Structural adequacy assessment: £1,200
- Findings: Beams 85% of required capacity, marginally inadequate for design loads
- Load restrictions imposed on mezzanine pending remediation
- Options: Accept reduced capacity (lose usable load), or replace all beams
Client chose replacement:
- Temporary support entire mezzanine: £4,500
- Remove 8 incorrect beams: £2,400
- Procure and install 8 correct beams: £14,000
- Lost revenue from reduced mezzanine capacity during work (3 weeks): £12,000
- Total: £32,900
Original beam cost difference: 305×165 UB40 vs 305×127 UB37 = £80 per beam × 8 = £640 more for correct beams
Ratio: £640 additional cost for correct beams vs £32,900 remediation = 51× cost multiplier
The Common Thread: Shortcuts and Assumptions
These failures share common themes:
"Close enough" thinking: 80mm bearing instead of 100mm, 3 bolts instead of 4, Grade 4.6 instead of 8.8—all seemed "close" but structurally inadequate
Time pressure: Rush to close up, meet program, finish before inspection—creates errors and omissions
Cost cutting: Smaller padstones, fewer bolts, unqualified welders—short-term savings become long-term disasters
Lack of verification: Assuming beam orientation, not checking delivered beam against drawings, not verifying substrate specification
Inadequate knowledge: Not understanding why specifications exist, treating requirements as negotiable rather than structural necessities
The Cost Reality: Prevention vs Remediation
Prevention costs (doing it right initially):
- Correct bearing substrate: £200-£400
- Proper padstones: £200-£300
- Specified bolts/connections: £100-£200
- Certified welding: £500-£800
- Adequate time (not rushing): £100-£300 additional labor
- Total prevention cost: £1,100-£2,000
Remediation costs (fixing it after failure):
- Structural engineering investigation: £600-£1,500
- Temporary support: £800-£1,500
- Opening up access: £500-£2,000
- Corrective work: £1,000-£5,000
- Rebuilding/finishing: £800-£2,500
- Building Control retrospective approval: £250-£500
- Delays and consequential costs: £2,000-£10,000+
- Total remediation cost: £5,950-£23,000
Ratio: 3-20× more expensive to fix than prevent
Plus intangible costs:
- Professional reputation damage
- Client relationship strain
- Insurance premium increases
- Potential legal liability
How to Prevent Beam Installation Failures
1. Verify specifications before procurement:
- Check structural drawings for exact beam specification
- Confirm bearing requirements (length, substrate, padstone details)
- Note connection specifications (bolt quantities, grades, torque values)
- Don't assume or guess—ask engineer if anything unclear
2. Inspect delivered beam before installation:
- Verify beam size against specification (measure if any doubt)
- Check for damage during transport
- Confirm beam orientation marks
- Don't install if wrong specification (however close it seems)
3. Prepare bearing surfaces properly:
- Level surfaces to tight tolerance (±3mm maximum)
- Clean thoroughly (no debris, loose mortar, dust)
- Install padstones as specified (not smaller, not different material)
- Use proper mortar bed providing uniform bearing
4. Install with adequate time:
- Don't rush installation to meet arbitrary deadlines
- Allow time for proper preparation, measurement, leveling
- Build in time for Building Control inspections before closing up
- Quality installation is faster than remediation
5. Use specified materials and methods:
- Bolts: Exact grade, quantity, and torque as specified
- Welding: Certified welders for structural work
- Connections: Follow structural drawings precisely
- Don't substitute "similar" items—use specified items
6. Verify and document:
- Check beam orientation before installation
- Measure bearing lengths
- Photograph bearing surfaces, connections, critical details
- Record measurements and installation date
- Create evidence installation matches approved design
7. Coordinate inspections:
- Notify Building Control before reaching inspection stages
- Don't close up before inspections
- Address inspector concerns immediately
- Obtain sign-off before continuing work
Conclusion: Installation Quality Determines Long-Term Performance
The perfect beam installed improperly fails just as certainly as the wrong beam installed perfectly. Structural adequacy requires both correct specification AND correct installation. The installation phase—bearing preparation, positioning, connections, protection—determines whether the structural design performs as intended or creates progressive failures requiring expensive remediation.
For builders undertaking steel beam installations, the message is clear: specifications exist for structural reasons, not bureaucratic ones. Shortcuts that seem minor ("80mm instead of 100mm bearing, close enough") create structural inadequacies that compound over time. The cost differential—£1,500 doing it right initially versus £8,000-£15,000 fixing it later—overwhelmingly favors quality installation.
Pratley's Builders Beams provides not just steel beams but installation guidance helping builders understand why specifications matter and what happens when they're compromised. We've seen the failures, we know the costs, and we help customers avoid the mistakes that turn straightforward installations into expensive problems.
Contact Pratley's Builders Beams at [contact details] to discuss your steel beam requirements. We'll provide not just the correct beam but the technical guidance ensuring installation success.
Because the right beam installed wrong still fails—and fixing failures costs far more than preventing them.

Submit comment Cancel Reply